Vector 3D
VzLight LED PCB for VzBot
VzLight LED PCB for VzBot
In stock
Couldn't load pickup availability
VzLight is a LED lighting panel on a PCB stick designed to illuminate the VzBot line of 3D printers. They include mounting holes and connectors to allow easy mounting and wiring into your 3D printer. All VzLights have black PCBs and are manufactured using high quality Electroless Nickel Immersion Gold (ENIG) process.
| VZLight300 | VZLight300Neo | VzLight400 | VzLight400Neo | |
| Designed for | Vz235 | Vz235 | Vz330 | Vz330 |
| Length | 300mm | 300mm | 400mm | 400mm |
| Width | 11mm | 11mm | 11mm | 11mm |
| Light Colour | White | RGB | White | RGB |
| Colour Temp. | 6000K~6500K | N/A | 6000K~6500K | N/A |
| Connector | JST XH 2 Pin | JST XH 3 Pin | JST XH 2 Pin | JST XH 3 Pin |
| Voltage | 24V | 5V | 24V | 5V |
| Power (Max.) | 4.1W | 4.6W (est.) | 5.3W | 5.8W (est.) |
| Operating Temp. | -30C to +85C | TBC | -30C to +85C | TBC |
| Light Emission Angle | 120° | TBC | 120° | TBC |
| Mounting Holes | 2 x M3 | 2 x M3 | 3 x M3 | 2 x M3 |
| PCB Colour | Black | Black | Black | Black |
More info
More info
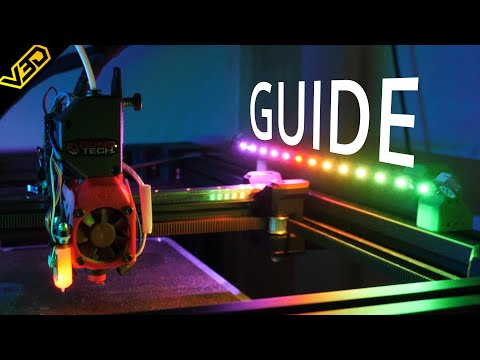
The RGB type are digital addressable type and Neopixel compatible allowing for fluid animations and vibrant colours. These are best used as indicators such as error lights, progress indicators etc.
For best illumination I use white LEDs and would recommend two per 3D printer, one mounted on each side.
Mounting
VzLight are designed to use M3 screws for mounting, you can use any solution you prefer but for simplicity I have designed a mounting system which you can download below.
Mounting hardware is not included so you'll need to purchase this separately. Remember to get hardware for mounting the bracket to the frame as well as mounting the VzLight to the bracket.
Wiring
VzLight is designed to use JST XH connectors and these come pre-soldered to the PCB. However, you'll need to make the wires for connecting to your control board and this hardware is not included. I recommend some 22AWG wire, JST XH connectors, and JST XH terminals, plus terminals and connectors for the connection on your control board.
For the White LEDs, its recommend to use a spare heater output on the control board but if you're board doesn't have one, good fan outputs tend to work ok as well, just be sure they can manage the power requirements shown in the table above.
Software and Control
Controlling white LEDs is relatively simple as they just need power, or a PWM signal if you want to control brightness.
For the RGB type you'll need 5V power and a digital signal pin on your control board. The firmware will also need support for RGB such as Neopixels.
For both white and RGB LEDs you will need some firmware configuration, you need to look this up for your specific firmware and the video below will probably help a lot.
You may also want to take a look at RainbowShift which is an RGB controller that runs WLED, a powerful lighting software for RGB and home automation but links into 3D printers running klipper very easily.
Downloads
Downloads
3D & STLs
Share


The VzLight (400mm) is well built and provides a very clean and bright light. I am using these it an enclosure for a larger size Bed Slinger printer, they provide great light coverage (2 VzLights, one mounted on each left and right top rails). No shadows when remote monitoring so you can see what you are printing well. Also, great time lapses and light for maintenance. I will be getting more of these.
Easy installation, very bright and nice color temperature.


